Description
There are three versions in the DM5E Family, which offer three levels of functionality.
- The DM5E Basic
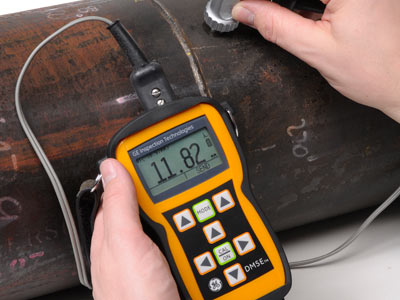
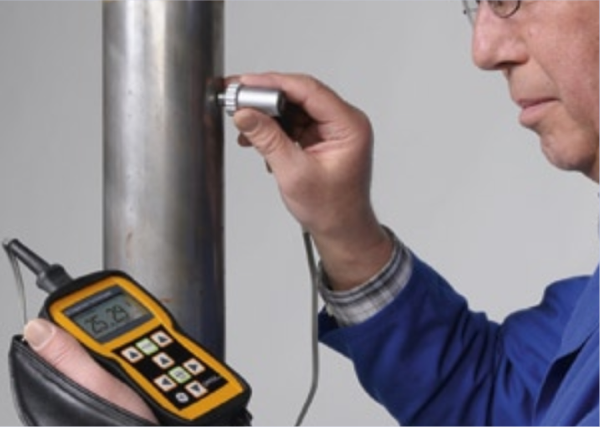
The rugged housing of the DM5E Basic is common to all versions. It is ergonomically designed with a weight of just 223g, including its AA batteries, which allow up to 60 hours of operation. The basic version is specified to EN 15317 and features an LCD data display, which is backlit to be visible in all lighting conditions. Instrument operation is carried out with one hand via a user-friendly interface. This is a sealed, watertight and dust-proof membrane keypad, which features a minimum of function keys and arrow keys. Navigation through menus is simple and intuitive. The basic version incorporates a wide range of features including Min/Max capture, B-Scan generation, alarms and differential thickness measurement to allow instant comparison between measured and nominal thickness. - The DM5E
The DM5E incorporates all the features of the DM5E Basic but also offers the DUAL MULTI operating mode. This has been used in previous GE corrosion thickness gauges and has proved invaluable in measuring thickness of metal through coatings. There is no need to remove the coating at the measuring point , saving time and money. Users can up-grade from DM5E Basic to DM5E in the field. - The DM5E DL
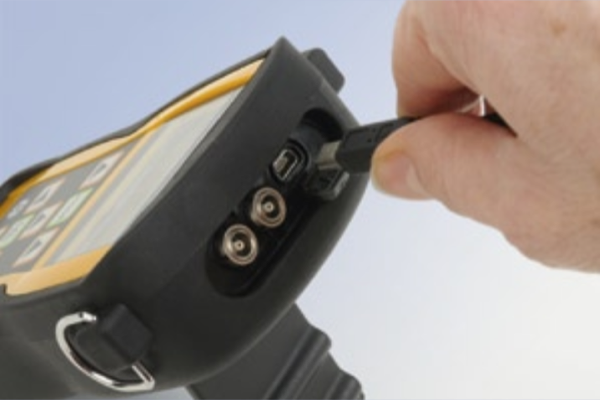
The DM5E DL is identical to the DM5E but features a built-in datalogger supporting grid style data file formats. This is capable of holding up to 50,000 readings. Files can be transferred to a PC by means of a Mini USB Com port . Files can also be imported directly into Microsoft Excel through a macro. All alphanumeric data for filenames and notes is directly entered via the key pad. Both the basic and standard versions are field-upgradeable to become DL versions.
All versions of the DM5E have the same user-friendly operator keypad interface. This has a central Mode key, a calibration/on/off key, two function arrow keys to activate and set functional control and four arrow keys for adjusting parameter values and for navigating through the intuitive single level menu. The keypad allows access to all calibration, set-up and measurement display modes of the instrument . With the DL version, a file display mode allows users to create and store thickness reading s in files. All calibration is menu-driven and the operator is guided through every step. There is a built-in calibration reminder, which can be set to remind the user to calibrate after a specified number of measurements or after a given time period.
A new set of ultrasonic probes has been developed for the DM5E family to provide the instruments with optimized performance, even at very high temperatures. The DA5xx series complies with EN 15317 and includes a 5 MHz standard probe for general purpose applications, a 2MHz version, for high penetration as well as a 7.5MHz fingertip probe. A newly developed 5MHz high temperature probe offers an operating range from -10°C up to +204°C. (Standard probes operate to 70°C)
Both the DM5E and the DM5E DL offer Dual Multi Measurement. Virtually all components and structures subjected to thickness measurement will have some kind of protective coating. Such coatings, including paint , contribute significant error to thickness measurements of underlying metal walls when using conventional methods. In addition, the removal of coatings, and their subsequent reapplication, involves considerable cost and time. With the field proven Dual Multi feature there is no need to remove any protective coating. It is only necessary to select Dual Multi mode, place the probe in position and take the measurement.
The DM5E DL has a built-in datalogger, with a capacity to store up a massive 50,000 reading in grid and linear files. This makes the measurement data available for further processing. Using our UltraMATE software. Measurement data files can be transferred from the instrument to a PC, where they can be stored and, if required, printed out in different fixed format reports. Typically, these can be colour histograms, where ranges of measured values are colour-coded, or colour can be used to highlight the distribution of minimum/maximum limit values exceeded. Data can also be pasted into Windows Clipboard for easy transfer into spreadsheet and word processing applications.

 DM5E Brochure